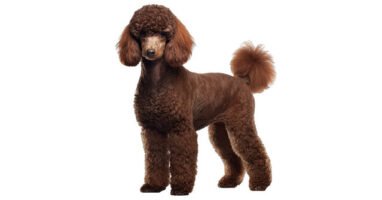
New to this? Start here, with the brushing. Most of poodle grooming is not the haircut at all.
It is the unglamorous upkeep between haircuts: brushing, bathing, nails, ears. Get those right and the clipping part becomes a skill you pick up over a few sessions.
This guide walks the whole routine in order, exactly as a professional would do it. Read it through once before your first attempt.
Your first full groom will take two to three hours; experienced owners finish in about ninety minutes, so the speed comes.
Start Here: What a Full Groom Actually Includes
A complete at-home groom has seven parts, always in this order: brush out, bath, dry, face and feet, body clip, nails, ears. Beginners should split it across two days at first. Brush, bathe, and dry on day one; clip and finish on day two.
Skipping steps is where beginners get into trouble. Bathing an unbrushed poodle felts the mats solid, and clipping a damp or dirty coat ruins both the finish and your blades. The order exists for a reason, and following it is most of the craft.
The Kit: Tools Worth Buying Once
Buy decent tools. A cheap slicker and an overheating clipper will put your dog off grooming for months, and you will end up buying the good versions anyway.
The essentials are a slicker brush, a steel greyhound style comb, and a quiet cordless clipper that runs cool. You also need blunt tipped scissors for around the eyes and between the toes, dog shampoo and conditioner, a vet approved ear cleaner, nail clippers or a grinder, and styptic powder for the odd nicked nail. A realistic starter kit runs roughly $80 to $200, with the clipper and dryer taking most of it.
Two upgrades pay for themselves quickly. A high velocity dryer straightens the coat for an even clip and blows out loose hair. Snap-on guide combs save you from buying several blades while you learn.
Blade Numbers, Decoded
Blade numbers confuse everyone at first, but the rule is simple: higher number, shorter cut. A #10 blade leaves about 2 mm and is the standard for face, feet, and sanitary areas. A #30 or #40 goes under guide combs for body work, and a #7F or #5F is a forgiving choice for clipping the body with a blade alone.
Check blade temperature against your wrist every few minutes. Blades heat up fast, and a hot blade burn is the quickest way to make a dog hate the clippers.
Step 1: Brush Out Before Anything Else
Always brush before the bath, never after. Water tightens tangles into felt, and felted mats usually have to be clipped out.
Work in sections and brush from the skin outward, a technique groomers call line brushing. Part the coat with one hand and brush the exposed layer down in short strokes, moving the parting as you go. Surface brushing feels productive but leaves a web of tangles at the roots.
Finish every section with the steel comb: if it glides from skin to tip, the section is done, and if it snags, go back with the slicker. Mats love the friction spots: behind the ears, the armpits, under the collar, and where the legs meet the body.
Step 2: The Bath
Most poodles need a bath every three to four weeks, sooner if they have been swimming or rolling in something regrettable. Use lukewarm water and a shampoo made for dogs, since human shampoo sits at the wrong pH and strips the coat.
Work the lather in with your fingertips, following the direction of the coat, because scrubbing in circles winds the curls into tangles you will have to brush out again. Rinse until the water runs clear, then rinse once more. Leftover shampoo is the top cause of the itchy, flaky skin owners blame on the shampoo itself.
Do not skip conditioner on a poodle. It softens the curl, cuts static, and makes the next three weeks of brushing easier. Leave it in for two or three minutes, rinse well, and squeeze the water out with a towel rather than rubbing.
Step 3: Dry Properly, Because It Decides the Haircut
A poodle left to air dry keeps its tight curls, and clipping over curl gives a choppy, uneven finish. Fluff drying is the fix: blow the coat dry with warm air while brushing it straight, section by section.
Keep the dryer nozzle moving and a hand’s width from the skin. Work from the legs up to the body and finish with the topknot and ears.
Step 4: Face, Feet, and Sanitary Trim
These three areas define the clean poodle look, and they are the safest place to build clipping confidence: use the #10 blade for all of them.
On the face, clip against the direction of growth, keeping the skin gently taut with your free hand. Loose skin around the mouth and throat folds catches easily, so short strokes and patience matter more than speed. Most dogs accept it within a few sessions if you keep each one brief and end with a treat.
Feet come next. Spread the toes and clip the hair between the pads as well as across the top of the foot. Clean feet track less mud indoors and make it easier to spot a thorn, a cracked pad, or grass seeds before they cause trouble.
The sanitary trim is plain hygiene: shorten the hair under the tail and along the belly so nothing sticks to it.
Step 5: Clipping the Body
For pet cuts, most owners use a guide comb over a #30 blade, which leaves an even length and forgives uneven pressure. Clip with the direction of growth for a smooth finish, or against it if you want the result a step shorter.
Work in long, overlapping passes, the way you would mow a lawn in strips. Check your work by combing through and looking for ridges, then fix them on a light second pass. Chasing perfection on the first pass is how dogs end up patchy and owners end up frustrated.
Watching a professional work once is worth a dozen written descriptions, and this groom along video shows the sequence, the hand positions, and the pace to aim for.
Step 6: Nails, Little and Often
Nails need attention every two to four weeks. If you can hear clicking on a hard floor, they are overdue. Long nails push the toes apart and change how the foot lands, which stresses joints up the leg over time.
With clippers, shave off thin slices rather than one big cut. On pale nails the pink quick is easy to see; on dark nails, stop when a grey or pink oval appears in the centre of the cut surface. A grinder is slower but more forgiving, and many dogs tolerate it better.
Keep the styptic powder open on the table before you start, not buried in a drawer. Nicks happen to professionals too. Pressure and powder stop the bleeding in a minute or two, and staying calm about it keeps the dog calm.
Step 7: Ears, Checked Every Session
Poodle ears hang closed over a hairy canal, so air barely circulates and wax builds up. At every groom, lift the flap and look: the skin should be pale pink and nearly odourless. Wipe the visible part with ear cleaner on gauze or a cotton ball, and never push anything deep into the canal.
Redness, a yeasty smell, dark discharge, or a dog who flinches when you touch the ear all mean stop cleaning and book the vet. Our guide to poodle ear infections explains the warning signs and how treatment usually works.
Picking a Cut You Can Actually Maintain
Beginners should start with one even length all over, the puppy or lamb style clip, and add shaping later. An even length hides uneven passes and needs the least daily brushing while you are still learning.
Our roundup of the best poodle haircuts and styles breaks down what each cut really costs in weekly upkeep, which is the honest way to choose. The hair always grows back, so a failed experiment is six weeks of mild embarrassment, not a disaster.
A Routine That Fits Real Life
Here is a schedule that works for most households: brush for five to ten minutes every day or two, concentrating on the friction spots. Add nails and an ear check every two weeks, and a full groom, bath to finish, every four to six weeks.
Plenty of owners split the job: all the home upkeep themselves, and a professional clip every second or third groom. Professional poodle grooming runs $50 to $100 or more per visit depending on size, coat condition, and where you live, so even the hybrid route saves money across a year.
Mistakes That Cause the Most Trouble
Bathing before brushing is the classic. Second is clipping a dirty or damp coat, which drags, heats the blade, and dulls it in one session. Bathe and dry first, clip second, every time.
Rushing ranks third, and it causes most nicks and most grooming fear. A tired, stressed dog on the table today is a dog who fights you for years. Split the groom, use treats, and stop while things are still going well.
Fourth is skipping the comb check because the coat looks fine on top. The guidance from the American Kennel Club and the grooming tips from the ASPCA both come back to the same point: little and often beats heroic rescue sessions.
When to Hand It to a Professional
Some jobs are not DIY jobs, and recognising them is part of grooming well. A coat matted tight to the skin belongs to a professional: pulling those mats out hurts, and slipping scissors under them cuts skin that is already stretched thin.
The same goes for anything you find while grooming that should not be there: lumps, sores, parasites, or skin that looks infected. Those are vet questions, and our overview of common poodle health problems helps you judge what is urgent. The Poodle Club of America publishes breed specific care resources too.
One last reassurance for beginners: nobody’s first poodle groom looks like the photos, and the coat forgives everything within a month. What your dog remembers is whether the experience was calm, so get that part right and the technique follows.
Frequently Asked Questions
How long does a full groom take a beginner?
Plan on two to three hours the first few times, including the bath and drying. Most owners settle near ninety minutes once the sequence becomes habit. Splitting the groom across two days is fine while you learn.
What blade do I use on the face and feet?
A #10 blade is the standard choice: close enough for the clean poodle look without going surgical short, which reduces the risk of irritation and nicks.
Can I use my own hair clippers on my poodle?
Not for long. Human clippers are built for finer, sparser hair and they overheat and drag in a dense poodle coat. A mid range pet clipper is worth buying properly.
My poodle hates the grooming table. What helps?
Shorten the sessions and separate training from grooming. Practise standing on the surface with treats and no tools at all, then add one step at a time across days. A non slip mat and a calm, unhurried pace matter more than any gadget.
Should I pluck the hair from my poodle’s ears?
Opinions are split, even among vets: plucking helps airflow in some dogs and irritates the canal in others. Ask your vet what fits your dog’s ear history.
Is it kinder to shave out bad mats or brush them out?
Shave them out. Tight mats pull constantly on the skin, and working them loose with a brush causes real pain. A short coat grows back in weeks; a dog who learns to fear grooming takes far longer to fix.