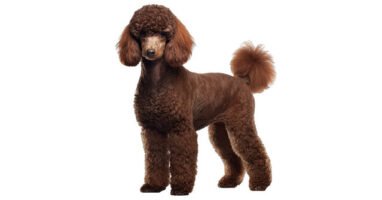
A poodle can look beautifully brushed and still be matted at the skin. The surface fluffs up, the top looks smooth, and underneath, close to the skin, loose hair is quietly tangling into felt. Groomers see this every week: a coat that felt fine to the owner and comes apart in mats the moment clippers go near it.
The tool that exposes the truth is not a brush at all. A plain steel comb, drawn slowly from the skin out to the tips, is the honest test of a brushed poodle coat. If it glides through, the coat is genuinely done, and if it snags, all that brushing only polished the surface.
Four Tools, Four Different Jobs
Most grooming kits fail because the tools get used interchangeably, as if any brush can do any job. They cannot. Each of the four tools below does one thing well and the rest badly, and the prices quoted are typical US retail ranges, not special offers.
The Slicker Brush: Surface Work and Fluff
A slicker is a flat or slightly curved head packed with fine, angled wire pins. Those pins separate curls, lift out loose hair, and break up light tangles, which makes the slicker the workhorse for short to medium pet clips. Expect to pay $10 to $40, with groomer favourites like the Chris Christensen Mark series sitting near the top of that range.
Its limit is depth. On a long or dense coat, short slicker pins skate over the top layer and never reach the skin, which is exactly where mats start. Size it to the dog: the large Big G suits a Standard, the medium size suits a Miniature, and the smaller Big K suits a Toy, with the medium size also the one to use on legs and furnishings. A slicker also scratches if you press and drag, so it does the loosening, never the checking.
The Pin Brush: For Coats Kept Long
A pin brush has widely spaced metal pins set into a cushioned base, and it suits coats kept longer than about an inch: full topknots, long ears, and the flowing jackets described in our guide to poodle haircuts and styles. The cushion gives as it moves, so it glides through length without snapping the ends the way a slicker can. Decent ones run $12 to $35, and the Chris Christensen Oval Pin is the style most often copied.
Look for smooth, polished pins. Ball tipped pins sound gentler, but the little balls catch on curls and can split hair over time, which quietly creates more tangles than it prevents.
The Steel Comb: The Mat Detector
The steel comb, usually sold in the Greyhound style with wide teeth on one half and fine teeth on the other, is the cheapest tool here at roughly $8 to $30. Brands such as Greyhound and Andis make the versions groomers tend to keep for years. Its job is not styling, only proof.
Run it through the friction zones after brushing: armpits, behind the ears, the collar line, the groin, and between the toes. These are the spots brushes miss and mats love. The comb through the ear fringe does double duty, because owners who handle the ears weekly tend to spot redness and odour early, the first signs covered in our guide to poodle ear infections.
The Dematting Tool: Emergency Use Only
A dematting comb or splitter has a row of curved, sharpened inner blades that slice a mat vertically into strands you can then brush apart. They cost $10 to $25 and belong on problem spots only, never as an everyday brush. Used carelessly in an armpit, where skin folds and moves, the same blades can nick skin.
Treat it as the last step before the mat wins and gets clipped out. If a mat is tight against the skin like felt, no blade is the safe answer. That one belongs to a groomer with clippers.
The Right Order: Line Brushing, Then the Comb
Good tools in the wrong order still leave mats behind. The sequence professionals use is called line brushing, and it is the brushing step inside a full groom a poodle at home routine. Here it is, step by step:
- Start with a clean coat, lightly misted with water or a detangling spray. Brushing a bone dry, dirty coat snaps hair and builds static.
- Begin low, at the legs and belly, and work upward. Gravity and coat growth both make top down brushing less thorough.
- With your free hand, push the coat up and hold it so a line of skin shows. That line is your working row.
- Brush only the hair below the line, with short strokes that start at the skin and pull outward. Groomers call the gentle version of this pat and pull.
- Comb that same row from root to tip. If the comb passes freely and falls out of the ends, the row is finished.
- If the comb snags, go back to the brush. If it still snags, work the spot with your fingers, then the dematter, then comb again.
- Let down a little more coat, make a new line, and repeat until the section is done. Finish with a comb through every friction zone.
Timing helps set expectations. A short pet clip might take ten minutes done properly, while a long coat can take thirty to forty-five minutes, and owners consistently report that the comb check at the end is the part they skipped for years. This groomer’s demonstration shows the line brushing and combing rhythm clearly:
Puppies Need Softer Tools and Shorter Sessions
Puppy coat is soft, fine, and far less prone to matting than adult coat, so a puppy kit can stay minimal: a soft slicker or a pin brush, used gently. Sessions of two or three minutes, finished with praise or a small treat, build the habit that matters. The goal at this age is a dog that stands calmly for grooming, not a perfect finish.
Then the coat change arrives, usually somewhere between nine and eighteen months. Adult curl grows in while puppy hair is still present, the two textures wrap around each other, and mats appear almost overnight. This is also why loose hair behaves oddly during the change, as our explainer on whether poodles shed covers in detail.
During those months, comb checks move from weekly to every day or two, especially behind the ears and in the armpits. Owners who keep up rarely face trouble. Owners who brush on the old puppy schedule are the ones whose dogs get clipped down to the skin at their first adult groom.
What to Avoid: Brush Burn and Bad Pins
Brush burn is the most common injury owners cause, and it is rarely the tool’s fault. It comes from scrubbing the same patch over and over with pressure, usually while fighting a tangle. The skin ends up red and raw, and the dog learns that brushing hurts, which makes every session after it harder.
The fix is technique, not force. Let the pins do the work in short strokes, hold the base of a tangle with your other hand so the pull does not reach the skin, and walk away from a stubborn spot and return to it. A useful test before any session: run the brush down the inside of your own forearm, and if it scratches you, it scratches your dog.
Cheap slickers are the usual culprits in that test. Pins on budget brushes are often cut rather than polished, uneven in length, and quick to bend flat, and a bent pin drags like a hook. Also avoid two habits entirely: cutting mats out with scissors near the skin, and bathing a matted coat before brushing it, since water tightens mats against the skin, a mistake the ASPCA’s home grooming guidance warns about as well.
Looking After the Tools Themselves
Brushes clogged with hair stop working properly, so pull the hair out after every session; a comb or a pen makes a good rake for lifting it off a slicker. Once a month or so, wash slicker and pin brushes in warm water with a drop of dog shampoo, rinse well, and dry them pins down so water leaves the cushion instead of pooling in it.
Steel combs need almost nothing beyond being kept dry, though a wipe with a lightly oiled cloth stops any rust spots on cheaper chrome. Inspect pins monthly: a slicker with bent, missing, or rusty pins is finished, however much it cost. Replacing a worn brush is cheaper than the coat damage a bad one causes over a winter.
Two Kits, Two Budgets
How much kit you need depends mostly on the haircut you keep, since longer styles demand the pin brush and more frequent combing. The AKC’s grooming advice makes the same basic point: regular brushing and combing, matched to the coat, prevents most matting problems before they start.
| Kit | What is in it | Typical total cost |
|---|---|---|
| Starter kit | Firm slicker brush, Greyhound style steel comb, detangling spray | $25 to $55 |
| Complete kit | Slicker brush, pin brush, steel comb, dematting splitter, detangling spray | $60 to $120 |
The starter kit genuinely covers a poodle kept in a short clip, provided the comb comes out every session. Add the pin brush when you grow the coat out, and the dematter only when you actually meet the mat that needs it. Buying all four tools on day one is how drawers fill with equipment that never gets used.
Frequently Asked Questions
How often should I brush my poodle?
For a short clip, two or three proper sessions a week usually hold mats off. Longer coats need brushing every other day, with a comb check each time. During the puppy coat change, check the friction zones daily regardless of coat length.
Can I just use one brush for everything?
No, and this is the mistake behind most surprise shave downs. A brush loosens and fluffs, but only a steel comb proves the coat is clear to the skin. Skipping the comb is how mats build up invisibly under a tidy surface.
Why does my poodle mat right after a bath?
Water tightens existing tangles and felts them closer to the skin as the coat dries. Any mat present before the bath comes out of it worse. Brush and comb the coat fully before bathing, and again while drying, and this stops happening.
Are expensive brushes actually worth it?
Up to a point, yes. What the money buys is polished, even pins that glide instead of scratching, and a cushion that keeps its spring. Past the mid range you are mostly paying for handles and branding, so a solid mid priced brush beats both the cheapest and the fanciest option.
My poodle hates being brushed. What helps?
First, check for a physical reason: a hidden mat or a patch of brush burn makes any dog object, and pain should be ruled out before behaviour. Then shorten sessions to a few minutes, brush after exercise when the dog is settled, and pair the brush with treats. Most resistance fades once brushing stops hurting and starts predicting good things.
When is a mat too far gone for a dematting tool?
When it sits tight against the skin like felt, covers a large area, or the skin underneath looks red or sore. At that point splitting it pulls on damaged skin and risks a cut. A groomer clipping it out is faster, safer, and kinder, and the coat grows back within weeks.


